Language:
 ∷
∷

∷
 ∷
∷


Here is an example.
Take the ROBIN MMX Spot moving head light as an example, create a new light library, the channel table of the moving head light is attached in the compressed package. The lighting fixture information is as follows.

Step 2. Add lighting fixture channel attributes.
When the three pieces of information for the lamp are completed, we can add the channel attribute for the moving head light.
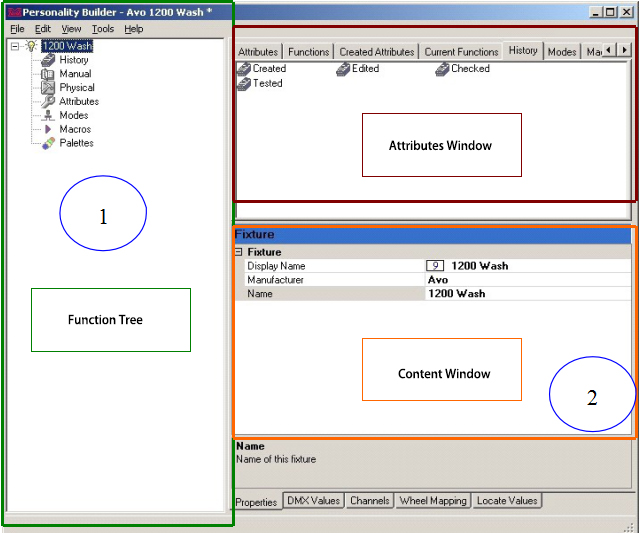
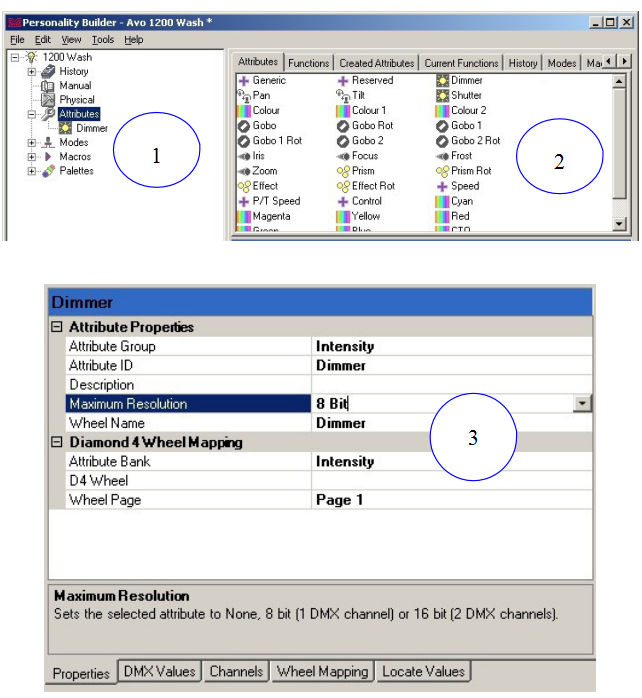
1. Select the "Attribute" option in the function tree, and multiple options with icons will appear in the attribute pane.
2. Find the channel attribute you need in the attribute window, double-click the icon to add it to the Attributes of the fixture (you can also drag directly from the attribute pane to the function tree).
3. Select the correct Maximum Resolution for each attribute, select the attribute name in the function tree, and change the "Maximum Resolution" in the drop-down arrow to 8Bit or 16Bit.
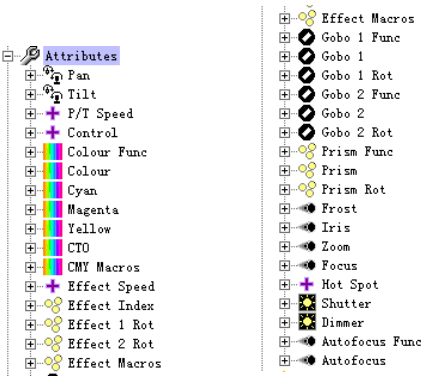
For example, according to the channel table, the first and second channels are Pan attributes, and the third and fourth channels are Tile attributes, that is, 16bit Pan and 16bit Tilt.

According to the channel table, the attribute status after the last addition is as follows.
Step 3. Add sub-functions for the lamp channel attributes.
1. Select the already added moving head light channel attribute and add it to the function from the sub-function option in the attribute pane.
2. When all attributes are added, you need to add DMX values for the sub-functions. Select the ‘DMX Values’ option at the bottom of the content window to add DMX start and end values for each function.
3. If you want to return to the content window, select the ‘Properties’ option to the left of the ‘DMX Values’.
4. Make sure that all created attributes have added sub-functions, and the relevant DMX information is filled correctly.
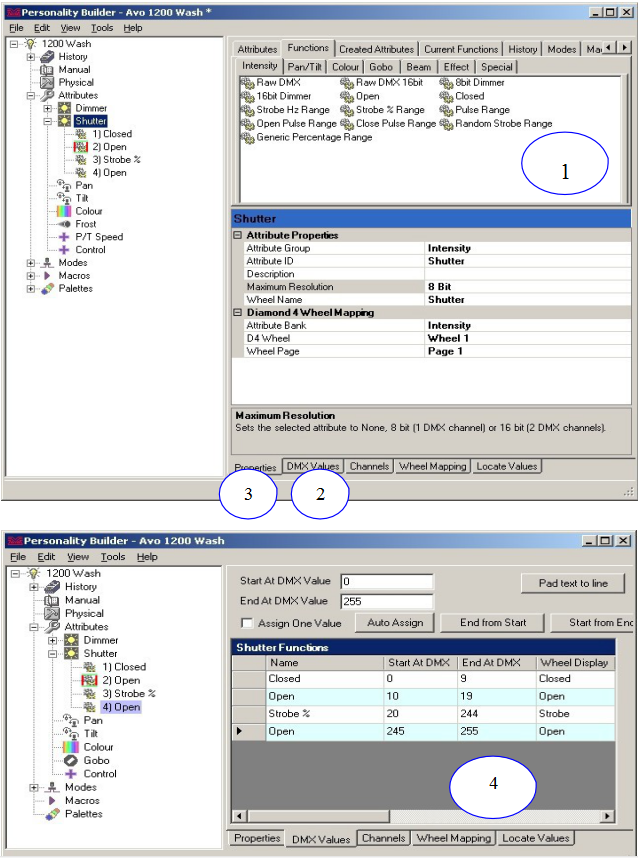
For example, according to the 26th channel Prism Rotation of the channel table, we can see that there are 4 sub-functions in this attribute, and each function has its DMX range.

Step 4. Create a lighting fixture mode.
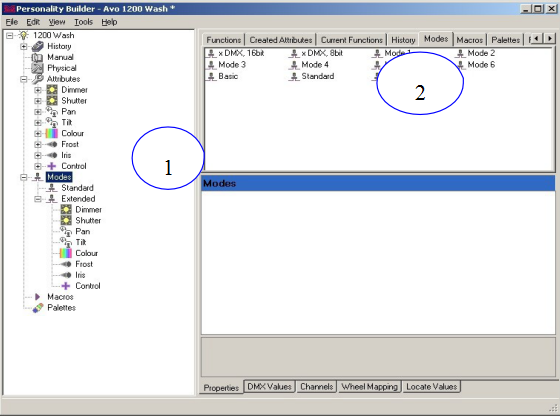
1. When all the sub-functions of all fixture properties can be added, enter the next step to create a fixture mode. Select "Modes" in the function tree.
2. Select a fixture pattern template in the properties window and double-click to add to the pattern list.
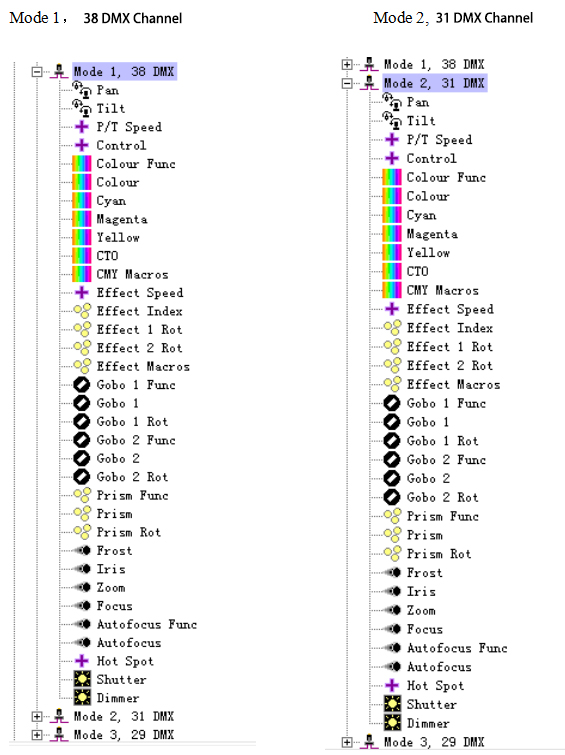
You can combine the lamp attributes according to your needs. First select the relevant mode in the fixture mode list, and then drag or double-click the corresponding attribute in the property window to add it to the corresponding fixture mode.
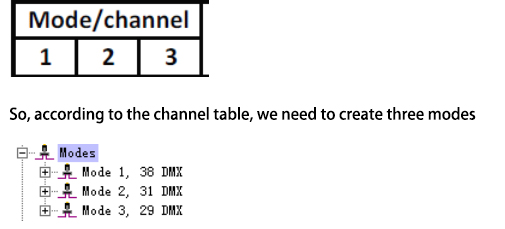
For example, ROBIN MMX Spot has three fixture modes.
According to the attribute corresponding to the channel table, select the corresponding fixture attribute in the corresponding fixture mode.
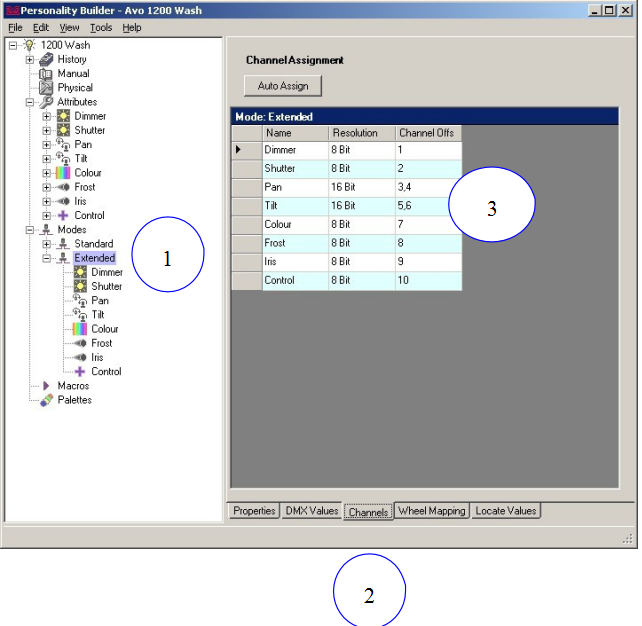
Step 5. Assign DMX channels to the fixture mode you created.
1. Select the fixture mode in the navigation window.
2. Select the "Channels" option at the bottom of the content window.
3. The values in this page are automatically generated, you need to modify the channel order in the "Channel Offs" column according to the order of your channel table.
Tip: If you have the same 16bit and 8bit functions in multiple different modes (usually horizontal/vertical), you should set the attribute resolution to 16bit and add them to all modes. For the 8-bit mode, you should enter its fixture mode separately, and then select the corresponding attribute to change the Resolution from 16bit to 8bit.
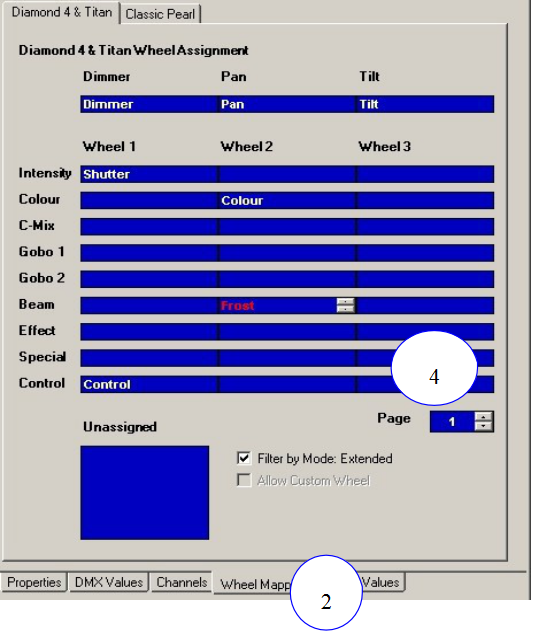
Step 6. Assign attributes to wheel positions.
After configuring all modes of channels, you must arrange a wheel position for each attribute.
The TITAN system console has 3 wheels, so the three columns in this window represent the three corresponding wheels.
1. Select the appropriate fixture mode in the navigation window.
2. Select the "Wheel Mapping" option at the bottom of the content window. On this page, if you check the "Filter by Mode Box" option, only the properties in this mode will be displayed in the window. If multiple lamp modes contain this attribute, then modify the position of the attribute in one of the modes, and the other modes will follow the modification.
3. When you click on the name of the attribute you want to modify, then drag it to any wheel position you want to assign.
4. If more than two or more functions are in the same wheel position, the name of the grid will turn red. You need to ensure that no functions overlap. Tip: If you need to put the attribute on the second page of the same wheel position, first drag the function to the "Unassigned" (not yet assigned) grid, then select the page you need, and then put "Unassigned" The attributes in the grid are assigned to the runner.
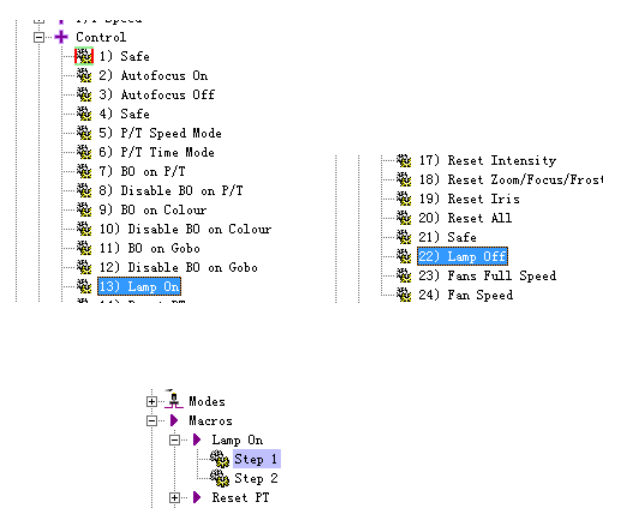
Step 7. Add the lamp on/off macro.
According to the channel table, the 13th sub-function item Lamp ON and the 22nd sub-function item Lamp Off in the Control channel in the fixture channel properties of the function tree.
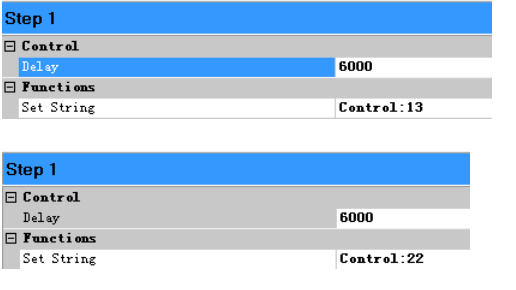
Two modifiable items will be displayed in the content window:
The first item Delay represents the delay of starting the function, usually 6000 milliseconds.
The second item, Set String, represents a serial function. According to the channel table, the 13th sub-function of the Control property is a bubble, so this function is connected in series.
After completion, as shown below.
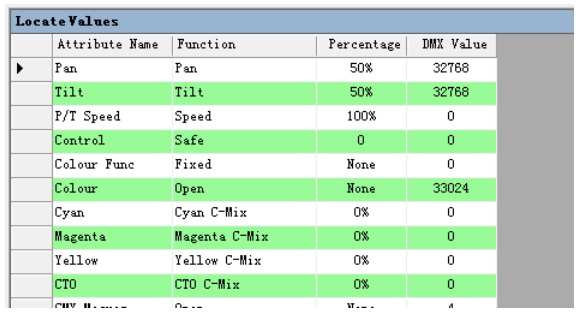
Step 8. Set the initial, high and low light status of the lamp
After completing the above steps, select the Locate Values item in the content window
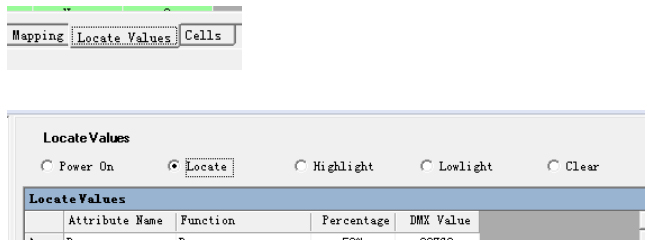
In this interface, you can choose to set Locate, Highlight, Lowlight, Clear. It can be directly modified in the following interface as needed.
Step 9: Adding the light library to your console.
• When all the above steps are completed, press the File button on the toolbar and select Save as. In the pop-up window, select the path to keep and the format to save.
• If you are not opening a personality builder on the lighting console, then you need to use the U disk to import the light library to the console, save the light library file to the U disk, and then insert the U disk into the console.
• On the console's touch screen, press Tool in the upper left corner, and then select the folder Folder. Open your U disk and copy the light library file.
• If your lighting console is version 5.0 or earlier, the save path of the library is C:\ProgramFiles\Avolites\Titan\FixtureLibrary.
• If your lighting console is version 6.0 or later, the save path of the library is D:\Titan Data.\FixtureLibrary
After the copy is complete, restart the console, press Patch to enter the patch menu, and then select to upgrade the light library to complete.
Contact: Michael Yu
Phone: +86 18038053060
Email: info@shiningledlighting.com
Add: No. 17, Dabu Road, Xinhua Industrial Zone, Huadu District, Guangzhou City, China